You don’t notice a sleeping pad much in the store. Then it’s 2 a.m., the ground is uneven, your hip is pressed into a root, and that “ultralight” decision suddenly feels expensive. The best lightweight sleeping pads strike a careful balance: low pack weight without sacrificing warmth, support, or durability. In this practical Lightweight sleeping pad guide, we’ll sort through air, foam, and self-inflating designs, break down R-values and seasonal use, and walk through real-world trade-offs. By the end, you’ll know exactly what to look for based on your sleep style, trip length, and weather—not just what looks good on a spec sheet.
Table of Contents
- How to Choose the Best Lightweight Sleeping Pads
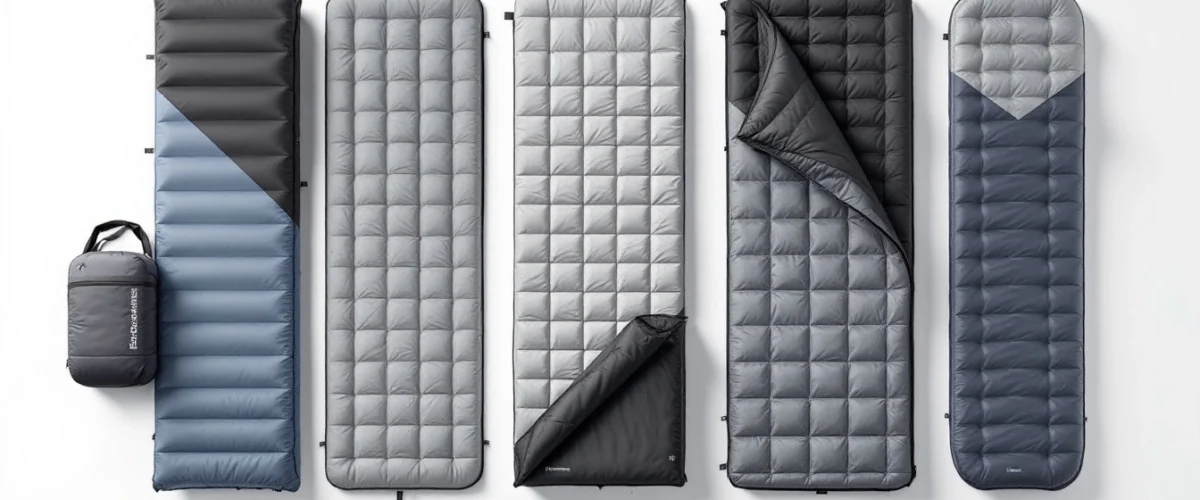
- Pad Types Explained (Air, Self-Inflating, Foam)
- R-Value, Temperature & Seasonal Use
- Weight, Packed Size & Durability Trade-Offs
- Comfort Factors Most Campers Overlook
- Comparing the Best Lightweight Sleeping Pads 2026
- Field Testing & Care Tips
How to Choose the Best Lightweight Sleeping Pads
Choosing among the best lightweight sleeping pads starts with honesty about how and where you camp. Forget brand hype. Think about how you actually sleep after a 20-kilometre day with a full pack.
Step 1: Define Your Sleep Style & Trip Type
Side sleepers usually need thicker pads to prevent hips and shoulders from bottoming out. A quick test: lie on your side, stay still for 30 seconds, and see if your hip compresses fully to the floor. If it does, that pad won’t survive night one on hard ground.
Back sleepers can often go lighter and thinner. But if you toss and turn, consider a wider model. Rolling off at 3 a.m. gets old fast.
For short weekend trips, comfort may outweigh shaving a few ounces. On multi-day or thru-hikes, cumulative pack weight matters more. Decide your priority before comparing specs—and make sure your shelter choice aligns by reviewing lightweight tent reviews with 7 stunning options in the lightweight tent guide for a balanced sleep system.
Step 2: Set a Realistic Weight Target
Sub-1-pound pads appeal to ultralight hikers, but those ounces come at a cost—typically lower insulation or thinner fabric. If dropping 3–4 ounces means losing a full R-value category, reconsider. Cold ground drains heat quickly, often more than cool air does.
For many backpackers, the sweet spot sits in the lightweight range: still compact, still manageable, but with enough cushion and warmth for real recovery—especially when paired with a carefully selected shelter from curated lightweight tent reviews covering 7 standout models.
Step 3: Balance Warmth, Thickness & Budget
Thickness numbers can look impressive, but beyond a certain point, gains become subtle. A well-designed 3-inch inflatable sleeping pad may feel more stable than a taller one with poor internal support.
Before buying, confirm manufacturer specifications directly from official brand pages. Cross-reference insulation details with guides like REI’s overview of
how sleeping pads work and how to choose one to understand the bigger picture.
Pad Types Explained (Air, Self-Inflating, Foam)
Air Pads: Maximum Comfort, Higher Puncture Risk
Inflatable sleeping pads dominate the lightweight camping mattress category for good reason. They pack small and can feel remarkably plush—much like the compact shelters highlighted in detailed lightweight tent reviews for backpacking setups.
Trade-offs? Punctures, potential cold spots, and sometimes noise. In a quiet shop, press down and shift side to side. If you hear crinkling there, expect it to be louder in a silent alpine basin.
On rocky terrain, always clear sharp debris before setup. If the ground looks suspect, consider layering with foam underneath.
Self-Inflating Pads: Middle-Ground Option
These combine foam cores with air. They’re typically heavier than ultralight air pads but more forgiving and warmer for shoulder seasons.
Setup is simple: open the valve, let it expand, then top off with a few breaths. For campers who dislike fully inflating a pad after a long hike, this design offers balance.
Closed-Cell Foam: Reliable & Budget-Friendly
Closed-cell foam pads rarely fail. They won’t pop, and they handle rough, rocky campsites well. The downside is bulk—you’ll likely strap them outside your pack.
In alpine conditions where sharp rocks are common, foam becomes a strategic choice rather than a budget compromise.
R-Value, Temperature & Seasonal Use
What R-Value Actually Means
R-value measures a pad’s resistance to heat flow. Higher numbers mean greater insulation from cold ground. Many manufacturers now use the
ASTM F3340 standard for sleeping pad R-value testing, which creates more consistent comparisons between brands.
Always confirm that a listed R-value follows this standard before comparing products.
Matching Pad to Season
Summer backpacking typically requires less insulation than shoulder-season or high-elevation trips. If you sleep cold, plan for at least one R-value level higher than general recommendations.
Remember: the ground temperature often matters more than air temperature. Frost under your tent floor will drain warmth regardless of a mild forecast.
Layering Strategy for Versatility
One practical trick is layering a thin foam pad under an inflatable sleeping pad. This boosts insulation and adds puncture protection.
Yes, it adds weight. But for unpredictable shoulder-season conditions, that flexibility can be worth a few extra ounces—especially when your entire setup is built around trusted lightweight tent guide recommendations to keep base weight in check.
Weight, Packed Size & Durability Trade-Offs
Fabric Denier & Longevity
Denier indicates fabric thickness. Higher denier fabrics typically resist abrasion better but weigh more. Check manufacturer specifications carefully.
If the fabric feels paper-thin in hand, treat it as such. Carry a patch kit and choose your campsite carefully.
Valve Design & Ease of Inflation
One-way valves and included pump sacks make inflation easier and reduce internal moisture. At elevation, blowing up a large pad manually can leave you lightheaded.
Quick field test: time how long full inflation takes. After a stormy day, you’ll appreciate efficiency.
Repairability in the Field
Multi-day trips demand redundancy. Pack a small repair kit and know how to use it before you leave. Test a patch at home once so you’re not learning in the dark.
Comfort Factors Most Campers Overlook
Pad Shape (Mummy vs. Rectangular)
Mummy shapes trim weight by narrowing at the feet. Rectangular pads add elbow room. If you sleep with knees bent or arms out, you’ll notice the difference immediately.
Surface Texture & Sleep System Compatibility
Some pads are slick. Pair that with a slippery sleeping bag on a silnylon tent floor and you may slowly slide downhill all night.
Test your system together. Don’t evaluate components in isolation.
Noise, Stability & Tent Floor Interaction
Set the pad on your actual tent floor. Shift side to side. If it squeaks or crinkles loudly in your living room, expect it to echo in the backcountry.
Also check campsite slope. Even the best pad can’t compensate for poor site selection.
Comparing the Best Lightweight Sleeping Pads 2026
Instead of chasing brand rankings, compare pads by verified specifications and use case:
- Weight: Actual trail weight, not just minimum spec.
- R-value: Confirm ASTM-tested ratings.
- Thickness: Especially critical for side sleepers.
- Packed size: Check real rolled dimensions.
- Best for: Ultralight thru-hikes, shoulder seasons, budget beginners, or rocky alpine trips.
Top picks typically fall into three categories:
- Ultralight minimalists: Lowest weight, careful campsite selection required.
- Side sleepers needing 3+ inches: Prioritize comfort and stable baffle design.
- Budget-conscious beginners: Often slightly heavier but reliable and cost-effective.
Field Testing & Care Tips
Pre-Trip At-Home Test
Inflate your pad fully and leave it overnight. If it softens noticeably, locate and repair leaks before your trip.
Campsite Setup Checklist
Clear rocks, twigs, and sharp debris before pitching your tent. Follow Leave No Trace principles as outlined by
the Leave No Trace Center for Outdoor Ethics when selecting and preparing a campsite.
In national or provincial parks, always review campground-specific guidance in advance, such as the camping regulations provided by
Parks Canada’s official camping resources.
Storage & Long-Term Care
Store self-inflating pads uncompressed with valves open when possible. Ensure all pads are fully dry before packing to prevent mildew or internal moisture issues.
Checklist
- Define sleep style and typical season.
- Confirm verified R-value rating.
- Check real packed size, not just marketing claims.
- Test inflation method and valve ease.
- Carry a patch kit on multi-day trips.
- Reassess trade-offs if cutting ounces reduces warmth significantly.
Common Mistakes
- Choosing the lightest option without checking R-value.
- Ignoring pad width and rolling off at night.
- Not testing noise levels.
- Skipping the at-home overnight inflation test.
- Forgetting that cold ground affects warmth more than air temperature.
Frequently Asked Questions
What are the best lightweight sleeping pads for side sleepers?
Look for pads with at least moderate thickness and stable internal construction. Side sleepers benefit from extra cushioning under hips and shoulders. Among the best lightweight sleeping pads, prioritize thickness and proven R-value over shaving the last ounce.
How do I choose the best lightweight sleeping pads for 3-season camping?
Choose a 3-season sleeping pad with a verified ASTM-tested R-value suitable for cool spring and fall nights. Confirm weight, packed size, and durability match your trip style in this Lightweight sleeping pad guide, then test the pad at home before heading out.
What R-value do I really need in a Lightweight sleeping pad guide for Canadian shoulder seasons?
Shoulder seasons often bring cold ground and frost. Many cold sleepers select a higher R-value than summer-only hikers. Confirm conditions for your specific region and plan with caution if nighttime temperatures approach freezing.
Are ultralight air pads durable enough for rocky terrain?
They can be, but require careful campsite selection and a groundsheet. In consistently rocky environments, adding a foam layer underneath offers extra protection and insulation.
Can I layer foam under the best lightweight sleeping pads for winter use?
Yes. Layering increases insulation and adds redundancy. This strategy improves warmth and helps protect your inflatable sleeping pad from punctures in cold conditions.
How long should a lightweight sleeping pad last with regular backpacking use?
Lifespan depends on fabric durability, frequency of use, and campsite care. With thoughtful handling and prompt repairs, many backpacking sleeping pads last for multiple seasons.
Conclusion
A good night’s sleep outdoors isn’t a luxury—it’s recovery, safety, and morale rolled into one. The best lightweight sleeping pads balance warmth, comfort, and durability in a way that fits your actual trips, not just your gear wish list. Weigh trade-offs honestly. Confirm specs. Test at home. When you choose from the best lightweight sleeping pads with your climate and sleep style in mind, every mile feels easier the next day.